
In the previous tutorial, we have completed the CRUD feature . This is the main feature that must be in the application.
However, there are still less ...
What is that?
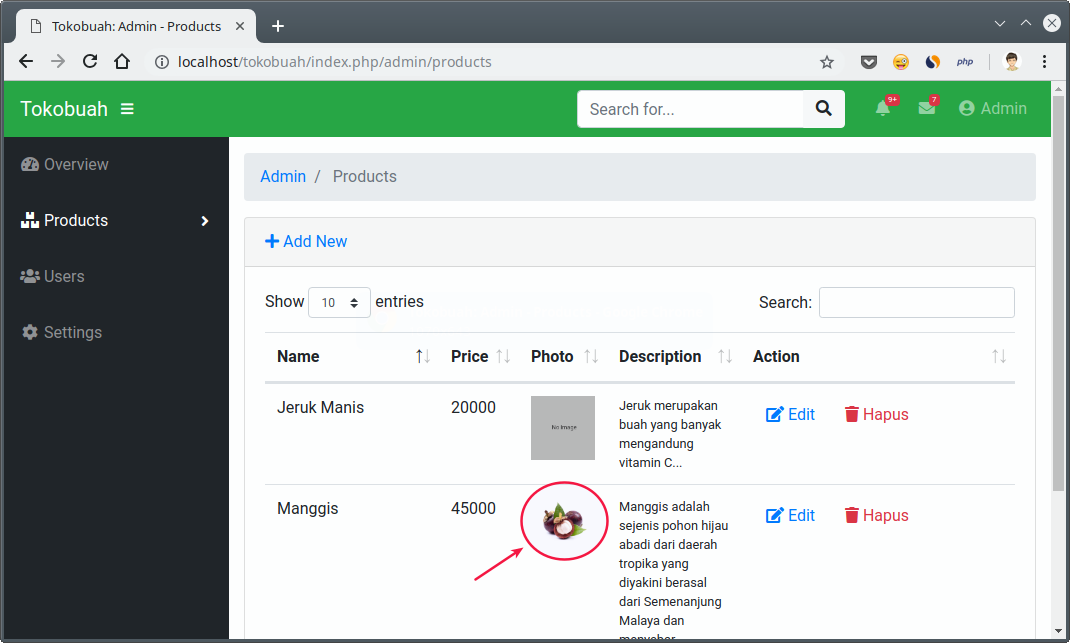
Pictures for products.
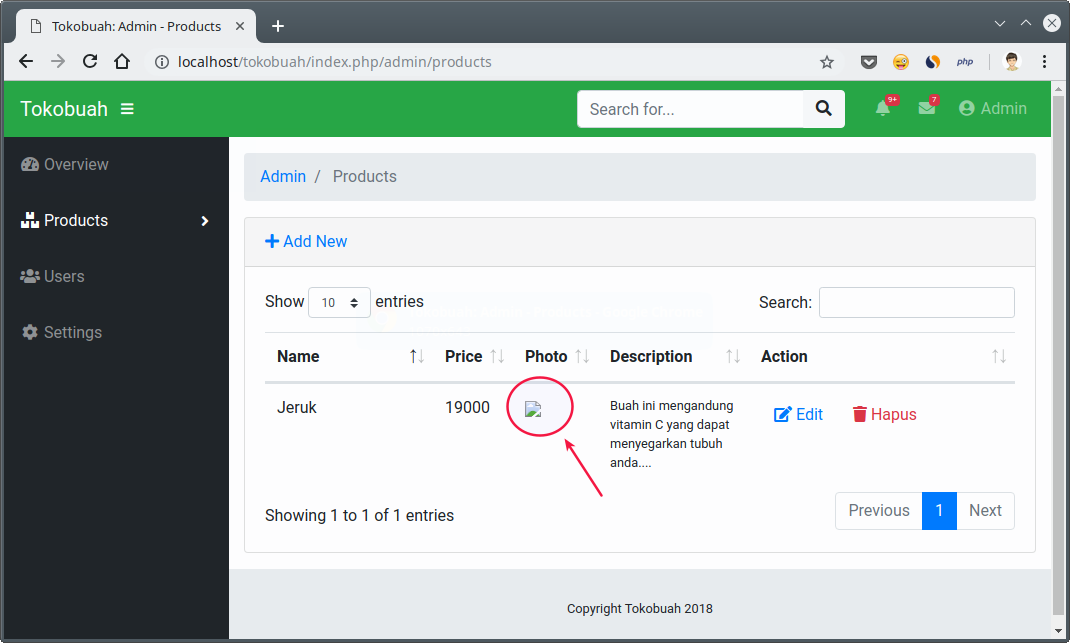
There is no product image. So a broken image will be displayed .
Images for products, we will be filled with values
default.jpg. If no image is uploaded.
If we see the path address used, this image will be located at
/upload/product/default.jpg.
Whereas we don't have folders and files
default.jpg.
How to handle it?
Simple…
We just have to create a new folder inside the project with a name
upload, then inside it contains another folder named product.
... and that's where we will put the file
default.jpg.
The image
default.jpgwill be a placeholder image if no image is uploaded.
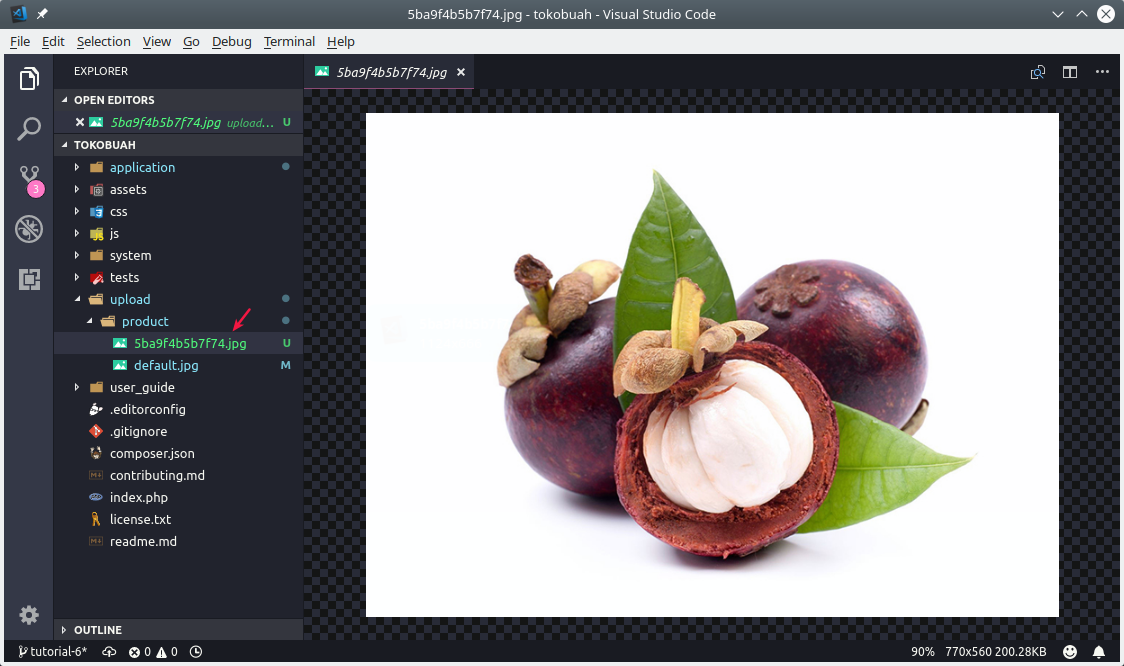
For example, I will fill it with the "No Image" image that I made with GIMP.
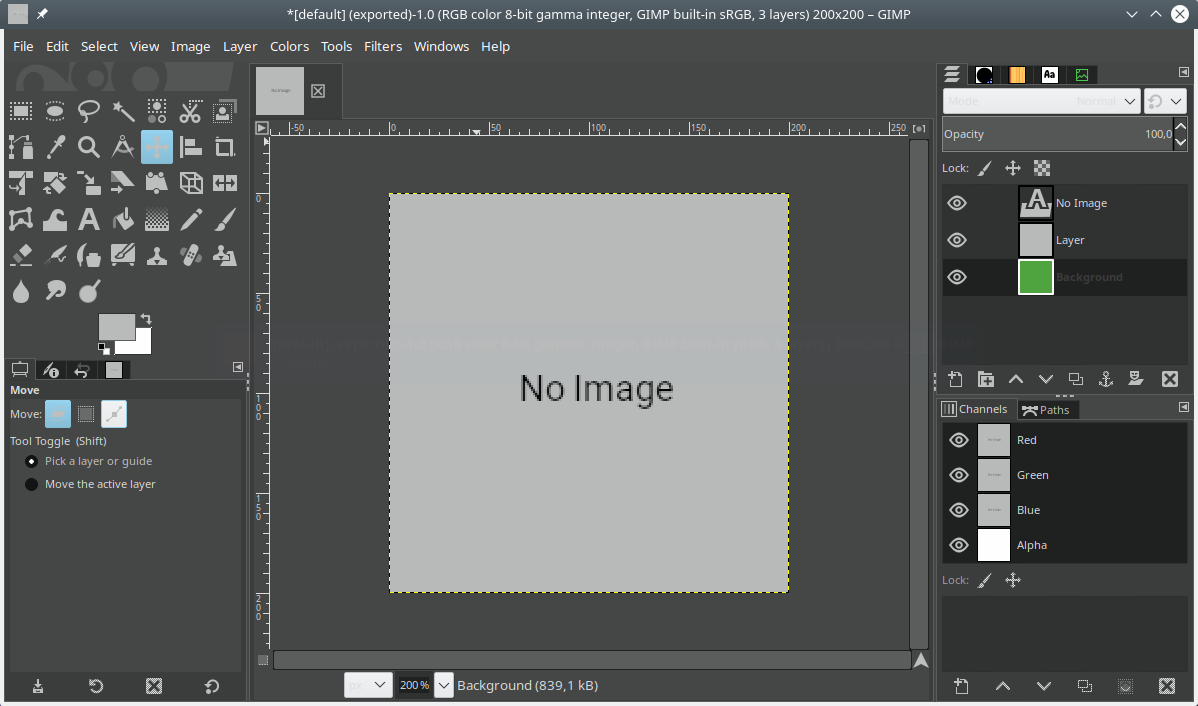
If you want to use this picture.
After that, please put the image in the folder
upload/product/
Then the result:
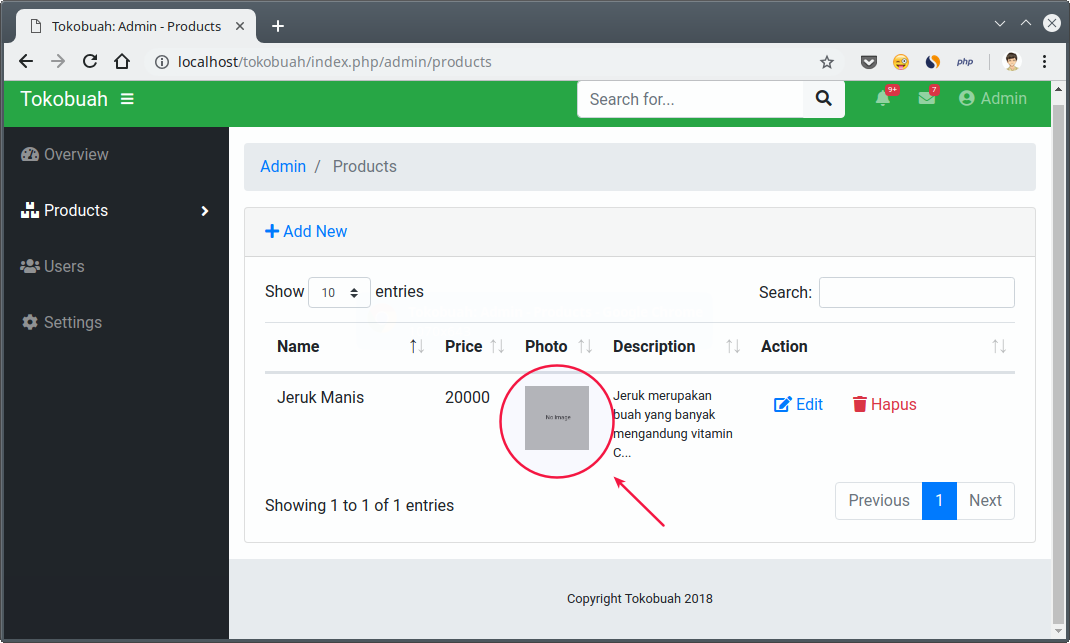
Nice!
But the problem is:
Not all products will use images
default.jpg.
Therefore, we have to make the upload feature, so the admin can determine the image he likes.
How to?
Let's discuss ...
Creating an Upload Feature on Codeigniter
Before we make the upload feature, we need to understand how the concept works.
Uploading files has a process flow like this:
- Users send files through the form;
- Files are uploaded to the server and stored in the
tmpfirst folder ; - We move the files in the directory
tmpinto the directoryupload/product/that we have created; - Finished.
Sounds simple ...
But let's look at the practice.
Please open the model
Product_model.php, then add the method _uploadImage() just below the method delete().
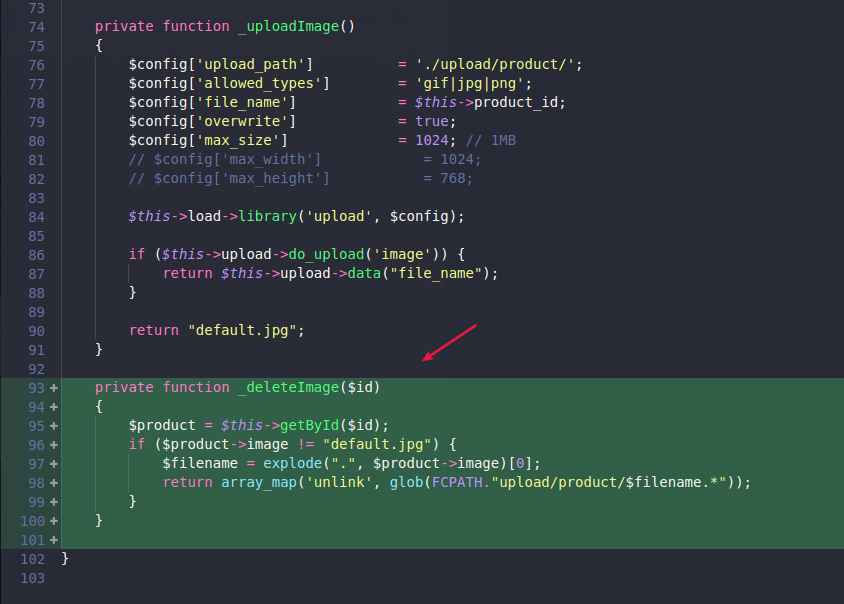
Here is the contents of the method code
_uploadImage():private function _uploadImage()
{
$config['upload_path'] = './upload/product/';
$config['allowed_types'] = 'gif|jpg|png';
$config['file_name'] = $this->product_id;
$config['overwrite'] = true;
$config['max_size'] = 1024; // 1MB
// $config['max_width'] = 1024;
// $config['max_height'] = 768;
$this->load->library('upload', $config);
if ($this->upload->do_upload('image')) {
return $this->upload->data("file_name");
}
return "default.jpg";
}
So it will be like this:

What does this method do?
Simple…
- We make a configuration to upload files such as:
upload_pathto determine the location of the file address will be uploadedfile_nameto specify a file name. Anyway, we will take the file name from the product ID. Therefore, we fill it with$this->product_id.overwriteto overwrite uploaded files when uploading new files (edit data).allowed_typesto limit the type of file that can be uploaded.max_sizeto determine the file size limit.max_wdithandmax_heightI deliberately commented so that it is not activated. This is the function to limit the size of the width and height of the image. If the uploaded image exceeds the specified size, the upload will fail.
- We load the library
uploadwith the specified configuration.$this->load->library('upload', $config); - We will restore the uploaded file name. If upload fails, then just return it
default.jpg.
Why is this method given a modifier
private?
Aren't we going to call him later from the Controller ?
Oh no-no ...
We will not call this method from the Controller . Therefore, we provide a modifier
priavate.
This method will then be called from the class
Product_model(the class itself), on the method save()and update().
Now, our task is to change the method
save()and update().
Using Method _uploadImage()
Guess what?
Where will we call this method?
Yep! We will use this method to fill the property
$this->image.
Please change the method
save()and update() become like this: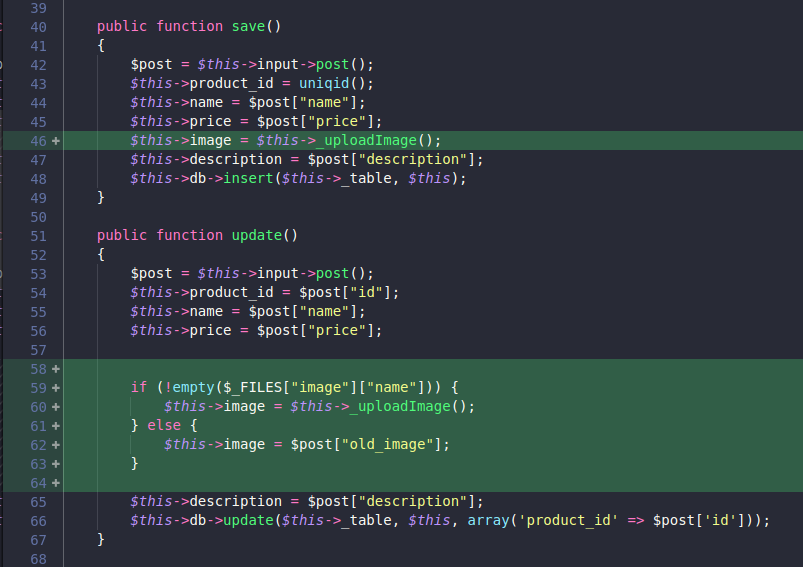
Especially for the method
update(), we make a check like this:if (!empty($_FILES["image"]["name"])) {
$this->image = $this->_uploadImage();
} else {
$this->image = $post["old_image"];
}
That is, if a file is uploaded when editing data, then upload the file.
But if it's not there, just use the existing file name (
old_image).
The value
old_imagewe get from the form, because edit_form.phpwe have created this field with type hidden.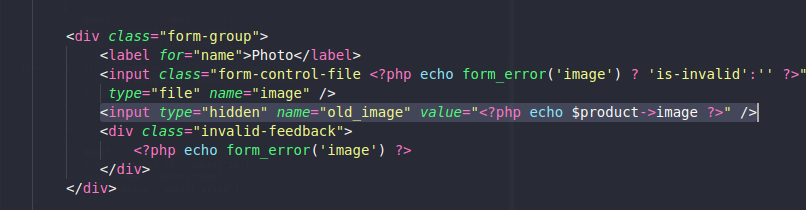
Trial Upload File
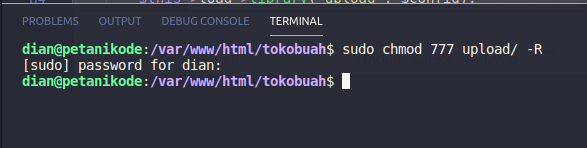
Before trying to upload, we must first change the access rights from the directory
upload.
If you use Windows, you don't need to do this.
But, for those of you who use Linux, this must be done so that the application can create new files in the directory
upload.
Please type the following command:
sudo chmod 777 /var/www/html/tokobuah/upload/ -R
Or on the terminal in VS Code, type like this:
sudo chmod 777 upload/ -R
We will be asked for a password, please fill in the password that you use on your computer.
After that, please try adding a new product and don't forget to include the picture.
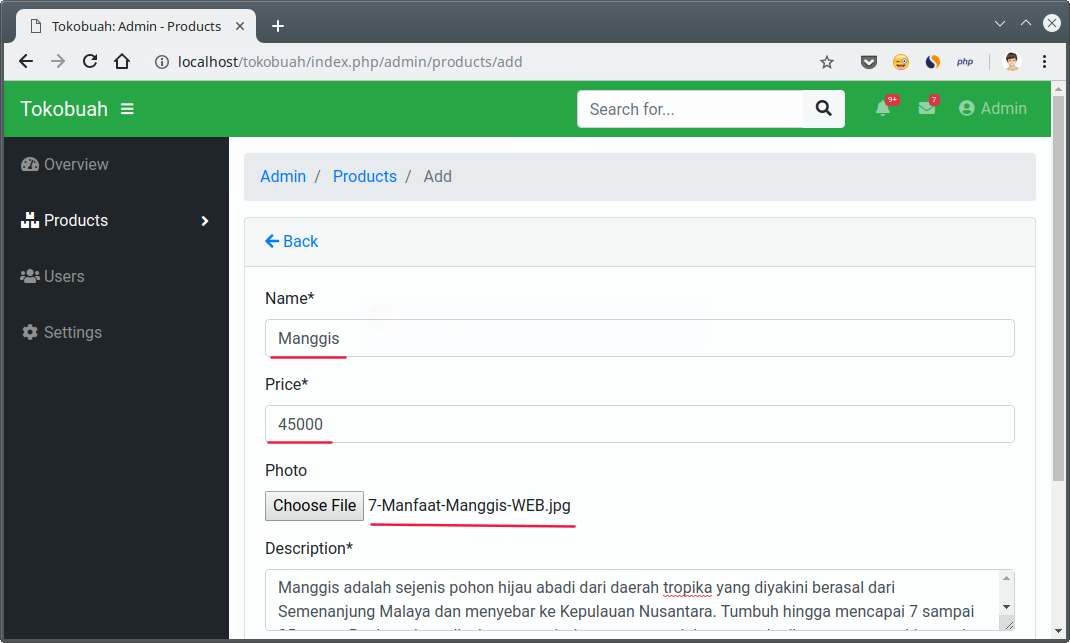
After that, click Save and open the list products page .
Then the result:
If we check the project directory, there will be a new file there.
Congratulations, we have successfully created the upload feature  ...
...
... But there's still something missing.
What is that?
When we delete data, the file will remain in the application. Because there is no function to delete files.
Let's fix it ...
Delete the uploaded file
We need a special method to delete the uploaded file.
Please add the following method to the class
Product_model, just below the method _uploadImage().private function _deleteImage($id)
{
$product = $this->getById($id);
if ($product->image != "default.jpg") {
    $filename = explode(".", $product->image)[0];
 return array_map('unlink', glob(FCPATH."upload/product/$filename.*"));
}
}
So it will be like this:
Finally, call the method
_deleteImage()on the method delete().
Okay, now we can delete data and also uploaded files.
Let's try ...
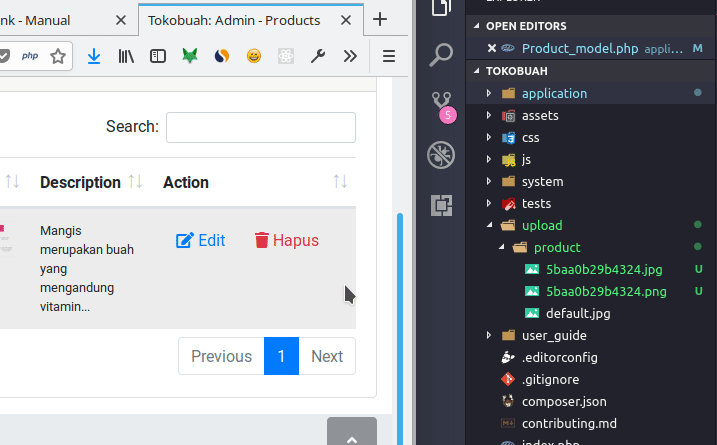
Yep! succeeded
Maybe you will ask,
Why are there two files deleted?
So this ...
Consider the method, specifically the code inside if .
if ($product->image != "default.jpg") {
$filename = explode(".", $product->image)[0];
return array_map('unlink', glob(FCPATH."upload/product/$filename.*"));
}
There we take the file name with the function
exlode(). Then we look for the file based on the name with the function glob().
After the files are found, then we use the function
array_map()to execute the function unlink()in each file found.
Tanda bitang (
*) after the $filenamemeaning of all extensions is selected.$filename.*
(Linux users must understand  )
)
This will then delete all files with the same name and any extensions.
Why is that?
Because the upload function that we created, there we are allowed to upload a file with the extension
jpg, gifand png.
When data is edited and uploaded images have different extensions than those already on the server ...
... then it will create a new file.
For example, on the server already exists
123.jpg, then uploaded again — for example a file .png— then it will be made again later 123.png.
How did it happen? Didn't we give a configuration
overwrite = true?overwrite in the upload configuration, it will only overwrite files with the same name and extension.
Example:
On the server already exists
123.jpg. When we upload files again with the same extension, it 123.jpgwill be overwritten with the new file.Troubleshoot and Debugging
I am sure, some of the friends who follow this tutorial will get errors and problems such as files that do not want to be uploaded.
Do not panic!
We must find the source of the problem.
Well for debugging the upload function, I recommend using this:
print_r($this->upload->display_errors());
Put this code in the method
_uploadImage() exactly before returnand turn it off return temporarily.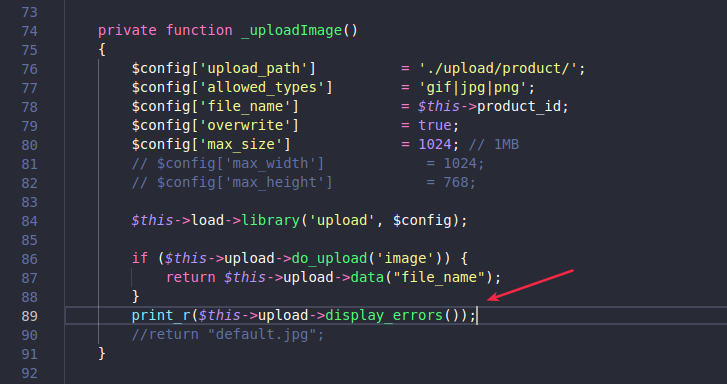
Later, if the error occurs, it will look like this:

On this error, the message is clear:
The upload destination folder does not appear to be writable.
The upload folder or directory cannot be written. This is proven by the value
imagein the SQL code section is NULL.
Why can it be NULL?
Because the function
_uploadImage()failed to upload and he will not return any value.
Later the value that will be used on this product is
default.jpg, because in the database table we define it like this.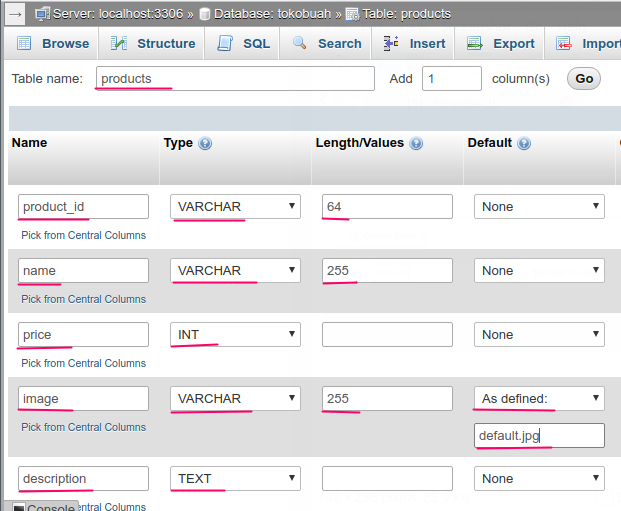
The solution to this problem is actually just changing the access rights to the directory
upload.
After that, try uploading again.
If successful, you can revive
returnand delete this function:print_r($this->upload->display_errors());
But if it still fails ...
... try here, send a screenshot of the error message via comments!
Who knows, we can help.


1 Komentar untuk "Codeigniter Tutorial # 6: Creating a File Upload Feature"
This blog post provides clear and helpful instructions on how to implement an image uploading feature.
Please comment according to the article